Gage Linearity and Bias Study
Home » SPC for Excel Help » Analysis Help » Measurement Systems Analysis Help » Gage Linearity and Bias Study
This page shows how to setup and run a Gage Linearity and Bias study. The data used can be downloaded at this link.
- 1. Select “MSA” from the “Analysis” panel on the SPC for Excel ribbon. Then select “Gage Linearity and Bias Study.” Select OK.
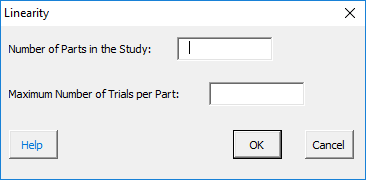
- 2. The input screen below is displayed. Enter the number of parts in the study and the maximum number of trials per part. The select OK.

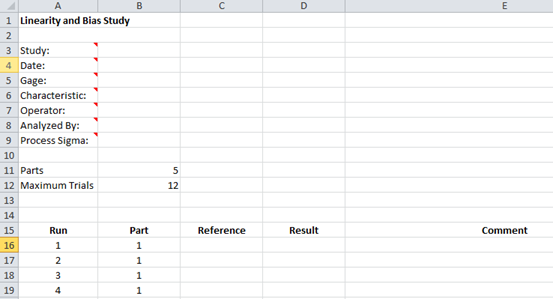
- 3. A Linearity and Bias Study worksheet is added to the workbook. This is where you enter the information about the study as well as the results.

- 4. Enter the information into the top part of the worksheet. There is a comment in each cell in rows 3 to 9 in column A that explain the entry. All entries are optional. Each entry is explained below.
- Study: optional, name of study
- Date: optional, date Gage R&R performed
- Gage: optional, name of gage
- Characteristic: optional, characteristic being measured
- Operator: optional, name of person performing the tests
- Analyzed By: optional, name of person doing the analysis
- Process Sigma: optional, used to determine the % linearity
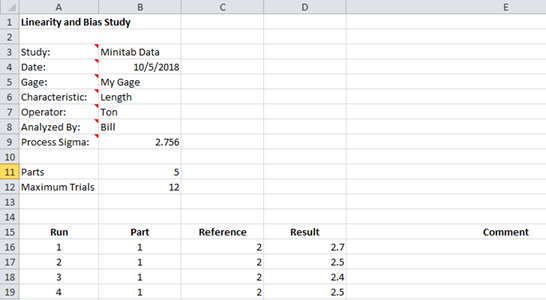
- 5. Enter the reference value and result for each run and part number. Comments can also be added.
- 6. Part of a completed ANOVA worksheet is shown below.

- 7. The results are now ready to be analyzed. To analyze the results, select “MSA” from the “Analysis” panel on the SPC for Excel ribbon. You will see the option to include the data table in the report. Select Yes or NO.

- 8. The linearity and bias report is added to the workbook on a single worksheet. An example of the output is at this link. The output include:
- Linearity chart
- Linearity results
- Bias results
- Data table
Please refer to the link above for more information.
